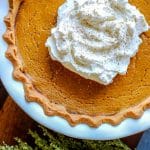
Keto Pumpkin Pie
A deliciously, low carb, gluten free, and sugar free pumpkin pie recipe that you and your guests would never know wasn't the "real deal".
Servings 8
Calories 140kcal
Ingredients
- [1 Keto Gluten Free Pie Crust ]
- 1 can Pumpkin Puree
- 2 Eggs
- 1 cup Heavy Cream
- 1 cup Allulose Sweetener this is less sweet compared to other low carb sweeteners. If using a different type maybe use 3/4 cup instead.
- 1 tsp Xanthan Gum helps set the pie, don't omit
- 1 tsp. Vanilla Extract
- 2 tsp Pumpkin Pie Spice
- Optional Whipped Cream Topping
Instructions
- READ THROUGH THE FULL RECIPE BEFORE STARTING! IT'S ALWAYS GOOD TO BE COMPLETELY PREPARED BEFORE DIVING IN (the full post above also is very helpful and I encourage you to read that as well).
- Prep your keto/ gluten free pie crust recipe. Check out my standard keto pie crust recipe linked or try a keto graham cracker style crust (this is a little faster to prep). Both are easy and work great with this pie!
- Once your crust is fully prepped add it to a greased pie plate and preheat the oven to 350 F. Set your oven so that the pie will fit easily on the middle rack. NOTE- The standard keto pie crust doesn't need to par-bake for this recipe but you will need to par-bake the keto graham cracker crust.
- In a large mixing bowl, combine all the pumpkin pie filling ingredients and whisk until smooth.
- Carefully pour the pie filling into your prepped crust. Leave about 1/4-1/2 inch of space to allow the filling to expand. Smaller pie plates may mean you have a little remaining pie filling, so please take note!
- Place your filled pie onto a baking sheet so it's easy to transfer in and out of the oven as needed. Place it on the middle rack and set a time for 15 minutes.
- Check the sides of your crust after 15 minutes. Almond flour burns easier than traditional flour. I like to usually add a pie shield to protect the edges from overbrowning or lightly cover the edges with foil. Continue baking from another 40 minutes.
- After about 50-55 minutes of total cooking time, check the center of the pie. The sides should be set and the center should be jiggly but not look like liquid. If it still looks too thin in the middle, allow it to bake for another 5-10 minutes or so. It's easy to slightly over bake, so I encourage you to keep an eye on it after this point.
- NOTES- The center should jiggle like Jell-O. If you're worried about over-baking and cracking the rest of the pie but the center still seems to undercooked, try turning the oven off at this point and letting the temperature slowly finish cooking the pie over the next 15-30 minutes.
- Once cooked, remove from the oven and allow it to cool on the counter until it reaches room temperature. Store covered in the fridge until ready to eat. Serve with whipped cream if desired.
Notes
The pie can be made and prepped ahead of time. I find it's best served with in 24-48 hours of making it but is delicious over a 5 day period.
Nutrition
Serving: 1g | Calories: 140kcal | Carbohydrates: 6g | Protein: 3g | Fat: 12g | Saturated Fat: 7g | Polyunsaturated Fat: 4g | Cholesterol: 80mg | Sodium: 29mg | Fiber: 2g | Sugar: 3g